 WARNING:
Before beginning any service procedure in this section, refer to Safety Warnings in section 100-00 General Information. Failure
to follow this instruction may result in serious personal injury.
WARNING:
Before beginning any service procedure in this section, refer to Safety Warnings in section 100-00 General Information. Failure
to follow this instruction may result in serious personal injury.
| 501-11 Glass, Frames and Mechanisms | 2013 - 2014 MKZ |
| Removal and Installation | Procedure revision date: 11/19/2012 |
Removal
NOTE: LH side shown, RH similar.
WARNING:
Before beginning any service procedure in this section, refer to Safety Warnings in section 100-00 General Information. Failure
to follow this instruction may result in serious personal injury.
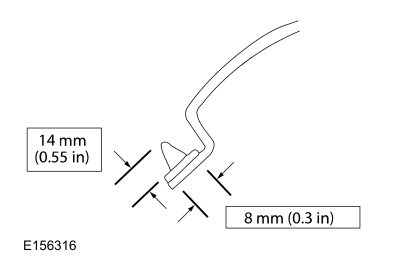
NOTE: Locating pins need to be cut through in order to remove the rear quarter window glass. The new rear quarter window glass will be equipped with new locating pins.
NOTE: Some resistance may be encountered when cutting though the glass locating pins.
General Equipment : Knife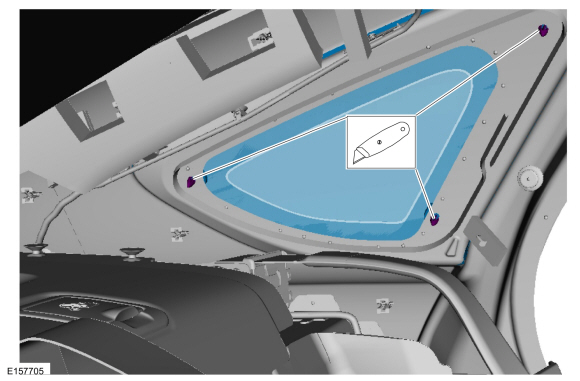


NOTICE: To avoid rust formation, use extreme care not to scratch the paint or primer or otherwise damage the pinch weld during glass removal.
NOTE: Lubricate the urethane adhesive with water to aid the Deluxe Air Knife 300-AST1770E when cutting.
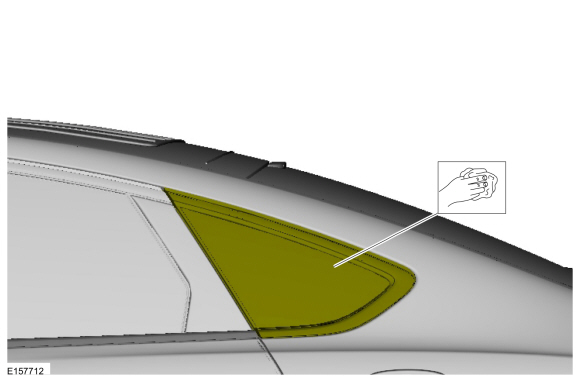
Working from inside the vehicle, cut the urethane adhesive starting at the top center and working toward the bottom corners then across the bottom and remove the rear quarter window glass.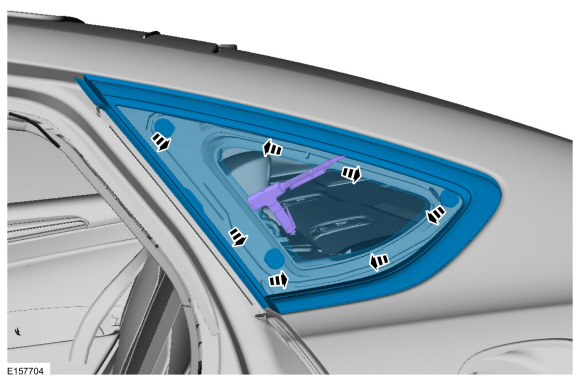
Installation
WARNING:
Repair any corrosion found on the pinch weld. The pinch weld is a structural component of the vehicle. Corrosion left unrepaired
may reduce the structural integrity of the vehicle. Failure to follow this instruction may result in serious injury to vehicle
occupant(s).
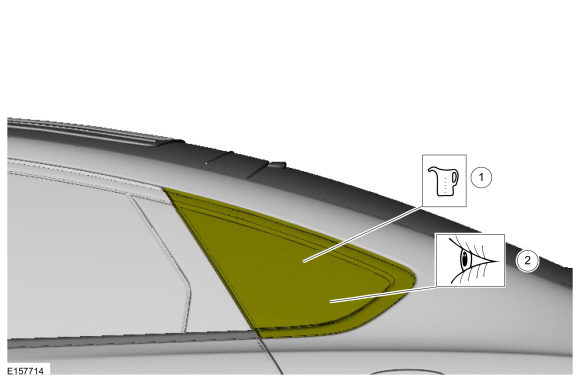
NOTE: Avoid scratching the pinch weld. Repair all minor scratches or exposed metal on the pinch weld following manufacturer's instructions. Use the same brand pinch weld primer, glass primer and urethane adhesive.
NOTE: Touching the adhesive surface impairs rebonding.
NOTE: Make sure the mating surfaces are clean and free of foreign material.

NOTE: Use the same brand and cure-rate products for the urethane adhesive and glass primer. Do not mix different brands of urethane adhesive and glass primer. For additional information, refer to the Material Chart in this procedure.
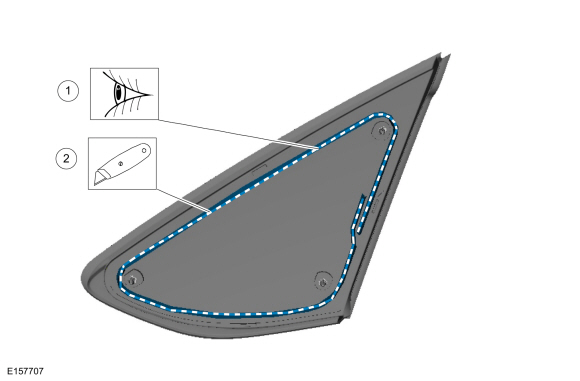
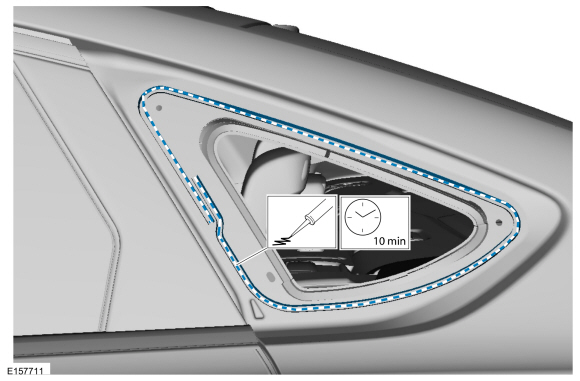
If installing a new rear quarter window glass, apply glass primer according to manufacturer's instructions. Allow at least 6 minutes to dry.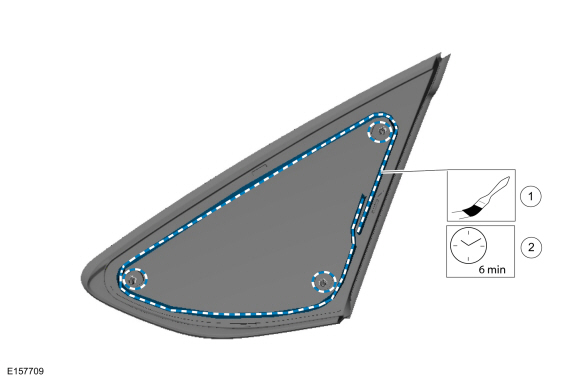
NOTE: The rear quarter window glass must be positioned within 10 minutes of applying the urethane adhesive.
NOTE: Use either a high-ratio air, electric or battery-operated caulk gun that will apply the urethane adhesive with less effort and a continuous bead.
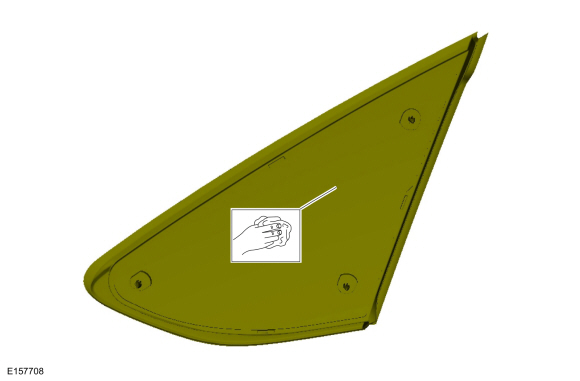
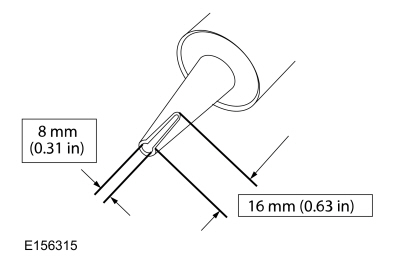
Apply urethane adhesive to the outside edges of locating pins on the rear quarter window glass.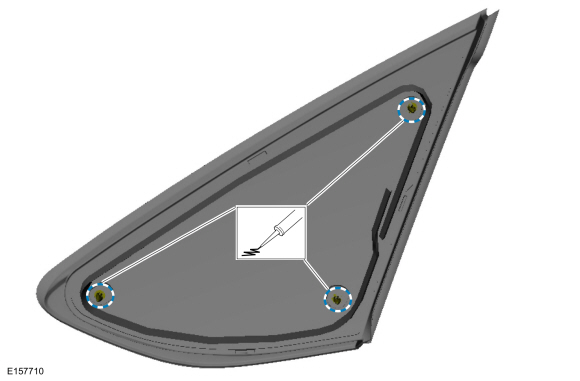
NOTICE: The door windows must be left open during the adhesive curing time.
NOTE: Use tape to secure the rear quarter window glass in the correct position until the adhesive has cured.
General Equipment : Adhesive Tape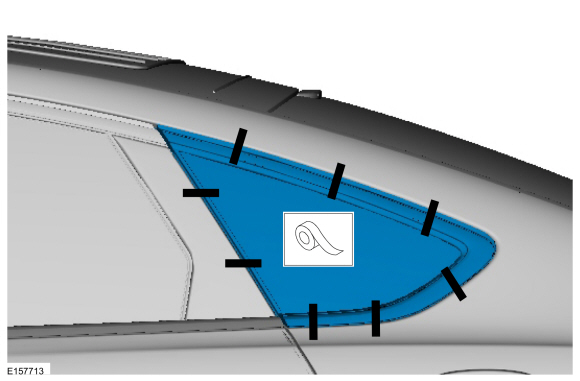
WARNING:
Do not drive vehicle until the urethane adhesive seal has cured. Follow urethane adhesive manufacturer's curing directions.
Inadequate or incorrect curing of the urethane adhesive seal will adversely affect glass retention. Failure to follow these
instructions may result in serious injury to vehicle occupant(s).
Copyright © Ford Motor Company