
| 501-20B Supplemental Restraint System | 2013 - 2014 MKZ |
| Removal and Installation | Procedure revision date: 07/9/2013 |
Removal
NOTICE: To prevent system failure, carry out the OCS reset when a front passenger seat cushion is disassembled, a new trim cover is installed or an OCS service kit is installed. Use a scan tool to carry out the OCS reset command.
NOTICE: The cushion heater mat on a front outboard passenger seat is not serviced separately. If a new cushion heater mat is needed on the front passenger seat, install an OCS service kit equipped with a heater mat. Failure to follow this instruction may result in incorrect operation of the OCS .
NOTE: OCS components (seat cushion foam pad, bladder with OCSM ) are calibrated to each other and are serviced as an assembly. The OCS components are not to be installed separately. If a new OCS , OCS component or seat cushion foam pad are needed, a new OCS service kit (seat cushion foam pad, bladder with OCSM ) must be installed as an assembly.
NOTE: Removal steps in this procedure may contain installation details.
All seats
NOTE: Follow the unique instructions or graphic for this step in the installation.
Refer to: Front Seat (501-10A Front Seats, Removal and Installation).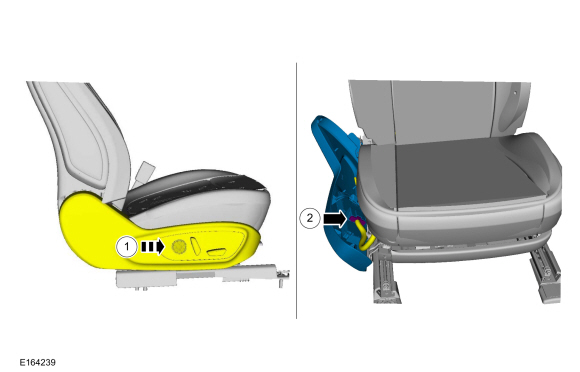

Heated seats

All seats
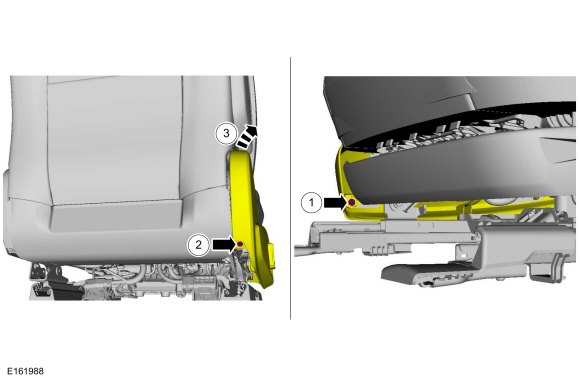
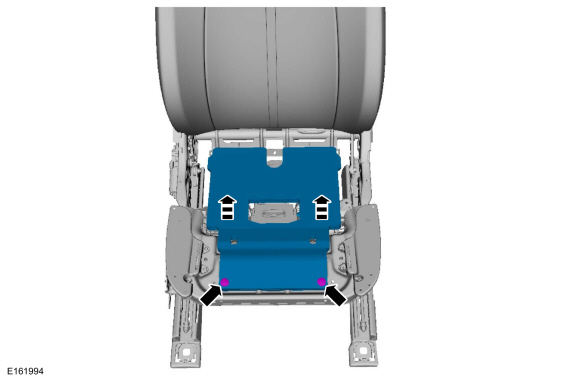
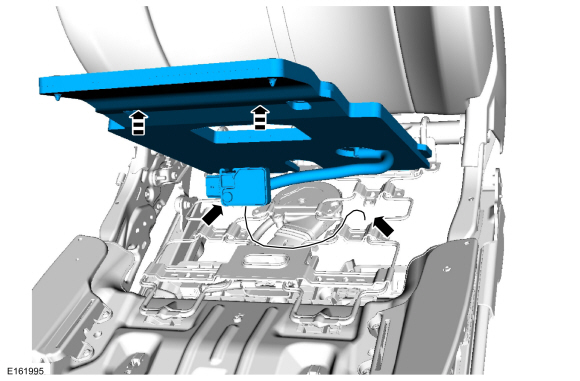
NOTICE: Using excessive force when bending the bracket can damage the OCS sensor housing.
NOTE: Follow the unique instructions or graphic for this step in installation.
General Equipment : Flat Headed Screw Driver
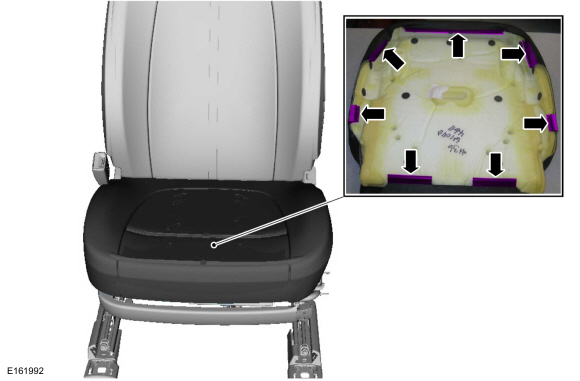
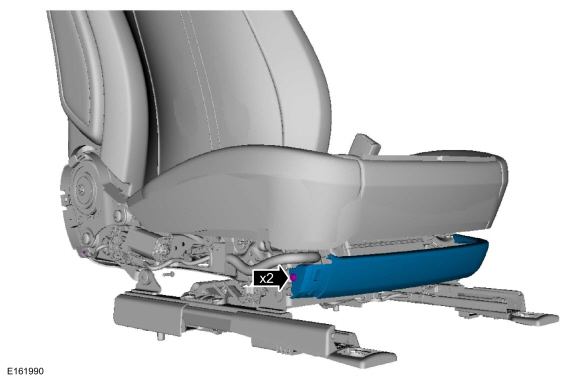
NOTE: OCS with multicontour seat shown, without similar.
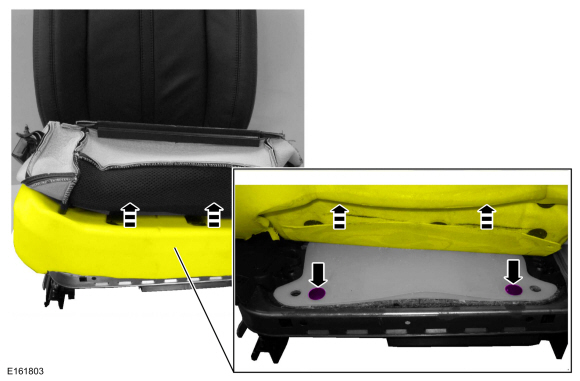
Lift the cushion foam pad. If the OCS is adhered to the cushion foam pad, then the OCS is a service kit. If the cushion foam pad is not adhered, then the OCS is original equipment (OE).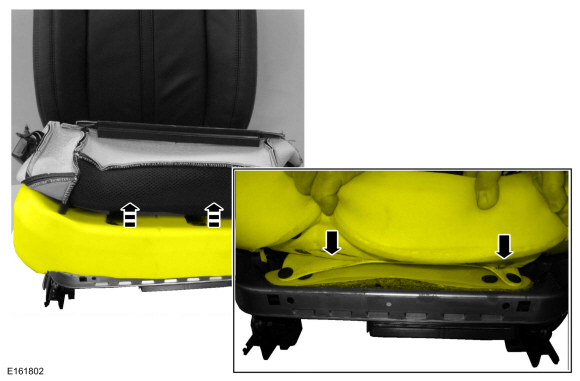
Seats with original equipment (OE) occupant classification system (OCS)
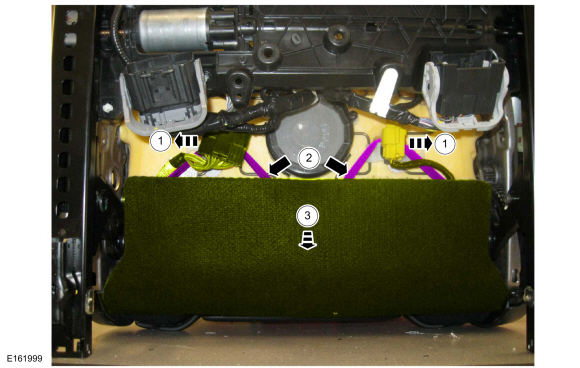
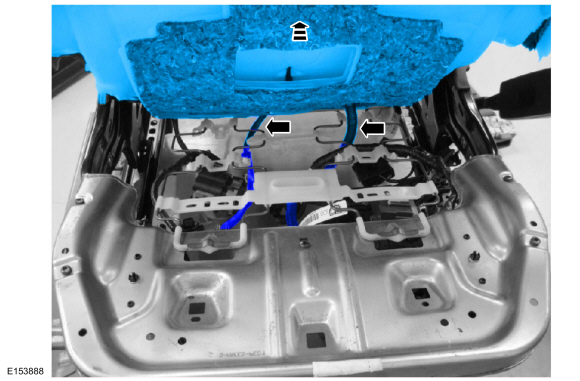
NOTE: This step is only necessary when installing a new component.
NOTE: During installation, make sure to route the sensor and hose through the correct opening.
NOTE: This step is only necessary when installing a new component.
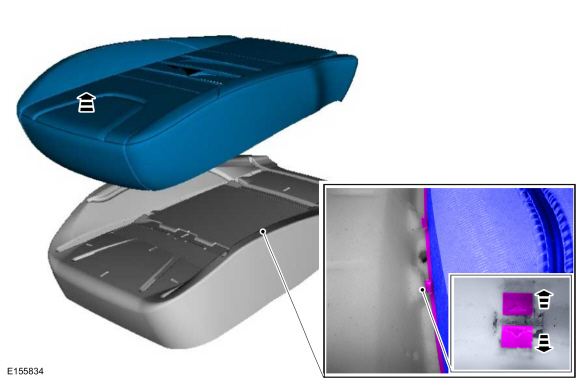
Seats equipped with service kit occupant classification system (OCS)
All seats
Installation
NOTICE: Inspect the OCS bladder, seat cushion pan and support assembly for any foreign objects before installing the OCS to the seat cushion pan. Remove any foreign objects. Failure to follow these instructions may result in incorrect operation of the OCS and may cause system failure.
NOTICE: Do not trap the pressure sensor hose incorrectly over the seat's suspension or spring. Route the hose so that it lays in a natural bend, and is not twisted due to being forced into an unnatural position. Failure to follow these instructions may result in component damage and/or system failure.
To install, reverse the removal procedure.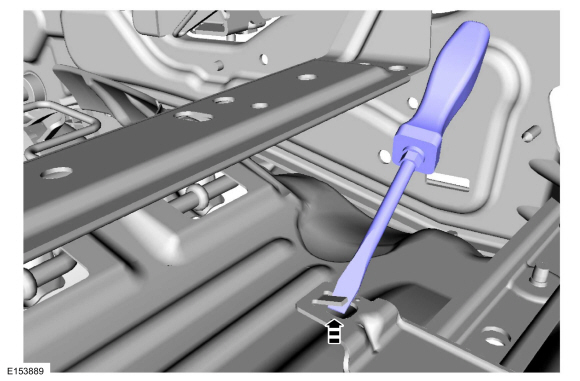
 WARNING:
Occupant Classification System (OCS) parts are calibrated as an assembly and must only be replaced in the configuration they
are sold. Never separate parts of an assembly. Failure to follow this instruction may result in incorrect operation of the
OCS and increases the risk of serious personal injury or death in a crash.
WARNING:
Make sure the front passenger seat repair is complete, the seat and all attached components (head restraint, seat side shield,
etc.) are correctly assembled, and the seat is correctly installed to the vehicle before using System Reset to rezero the
seat weight. Failure to follow these instructions may result in incorrect operation of the occupant classification system
(OCS) and increases the risk of serious personal injury or death in a crash.
NOTICE:
To prevent system failure, take the following precautions before carrying out the
OCS
reset.
Copyright © Ford Motor Company