| 501-19 Bumpers
|
2013 - 2014 MKZ
|
| Removal and Installation
|
Procedure revision date:
06/25/2013
|
Front Bumper Cover
Removal
NOTE:
Removal steps in this procedure may contain installation details.
-
Refer to:
Health and Safety Precautions
(100-00 General Information, Description and Operation).
-
-
-
-
Refer to:
Wheel and Tire
(204-04B Wheels and Tires, Removal and Installation).
-
-
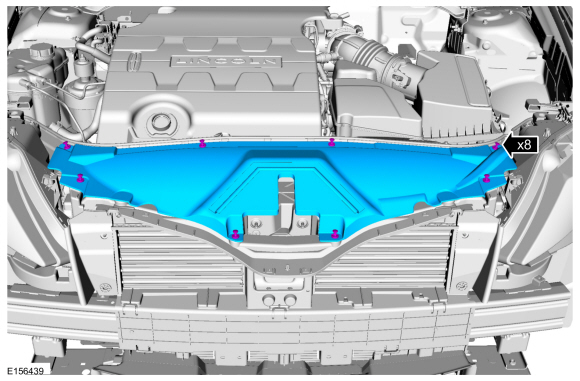
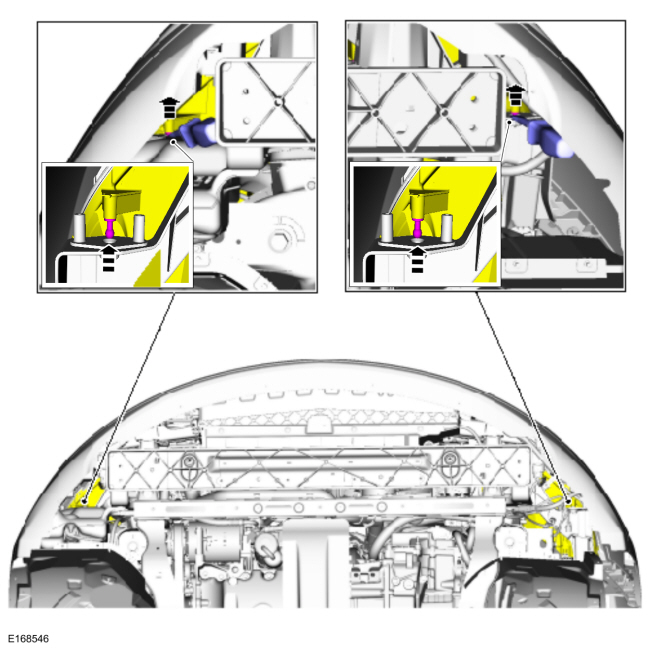
Four on each side.
-
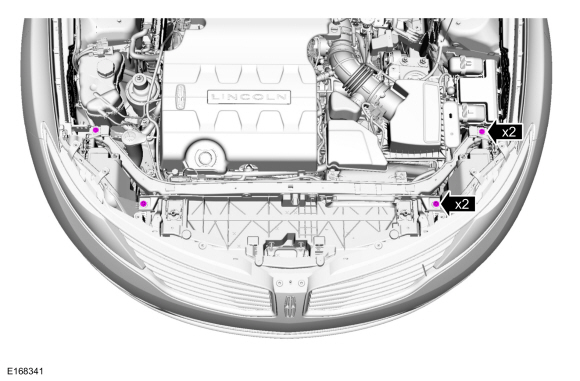
Two on each side.
-
-
-
-
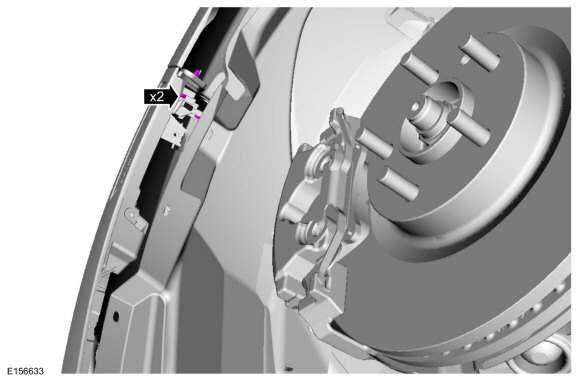
On each side.
-
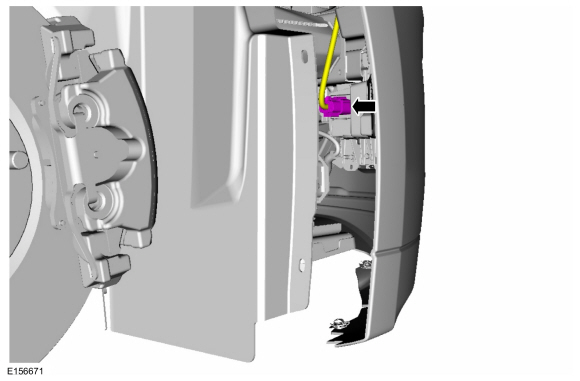
Using a screwdriver, disengage the ball studs.
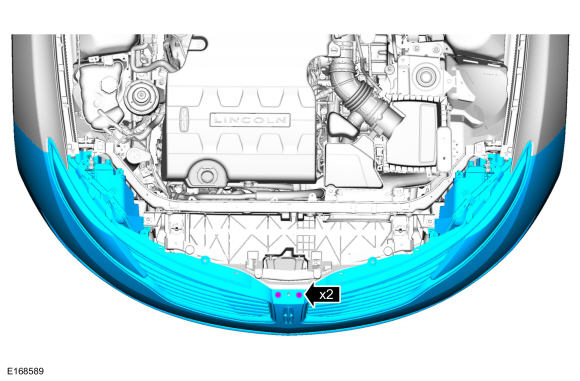
-
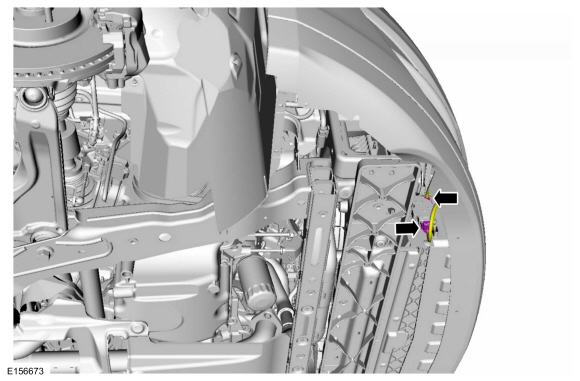
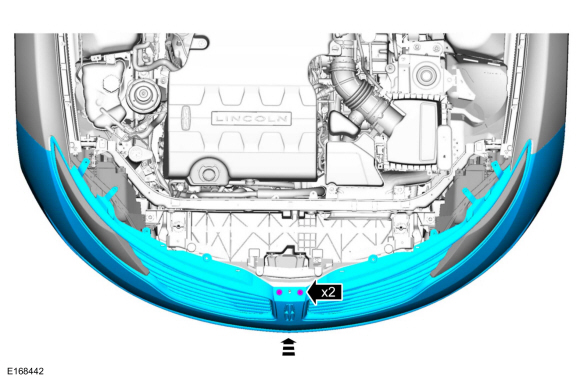
Remove the front bumper cover screws.
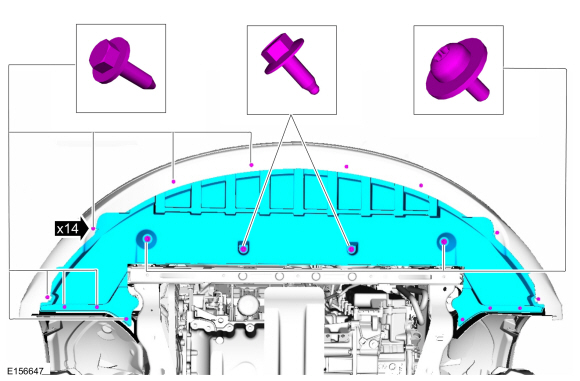
-
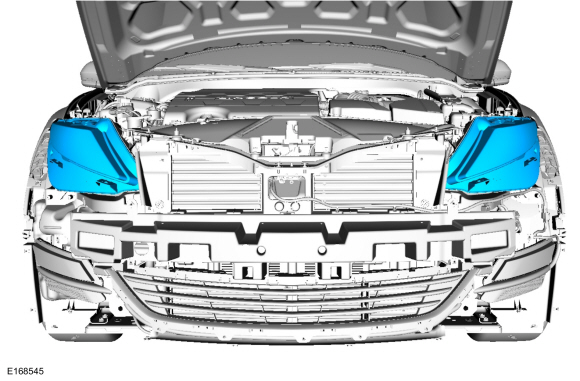
-
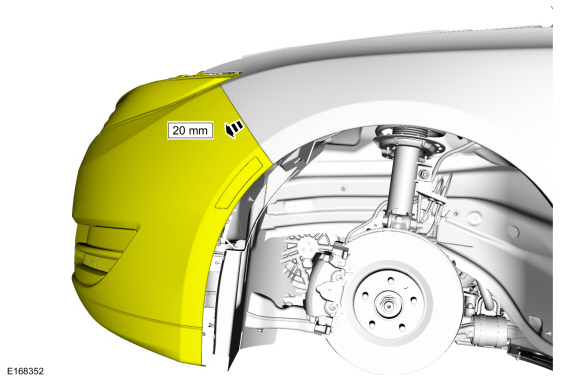
Rotate the front of the front bumper cover down 10 degrees and remove the front bumper cover and headlamps as an assembly.
-
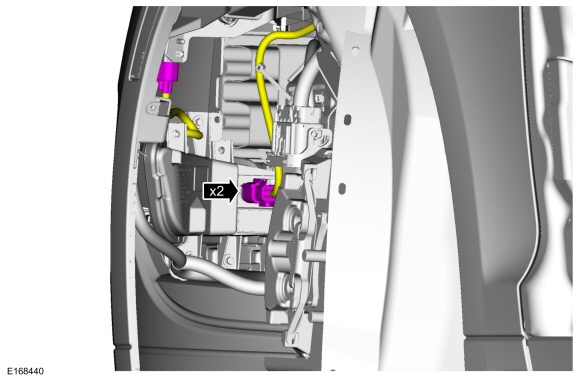
Disconnect the
and
headlamp electrical connectors.
Installation
 A video version of this procedure is available on-line.
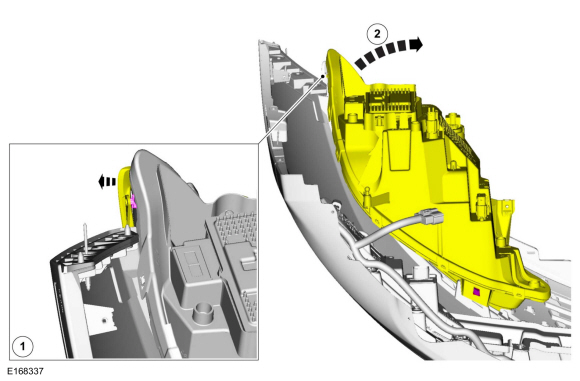
-
-
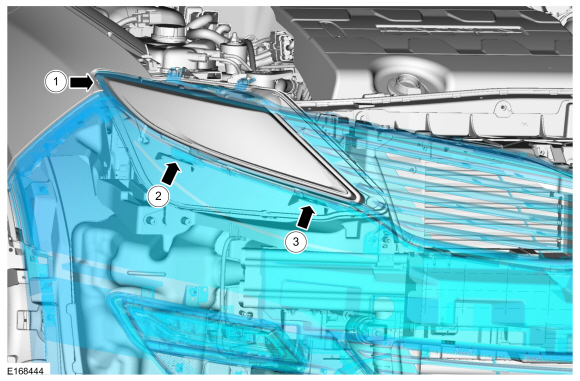
Release the headlamp to grille opening panel alignment pin.
-
Push the headlamp toward the bottom of the front bumper fascia to release the outboard clip.
-
Rotate the headlamp assembly toward the center of the front bumper fascia and down toward the bottom of the fascia to release
the inboard clip.
-
-
Install the headlamp and engage the ballstud.
Refer to:
Headlamp Assembly
(417-01 Exterior Lighting, Removal and Installation).
-
Loosely install the headlamp screws.
-
Rotate the front of the front bumper cover up 10 degrees and position the front bumper cover.
-
NOTE:
On both sides.
NOTE:
The headlamp assembly to grille opening panel clips make a distinct audible click when they engage.
-
Engage the grille opening panel on the grille opening panel to headlamp assembly locator pin.
-
Press on the front bumper cover and engage the outboard clip.
-
Press on the front bumper cover and engage the inboard clip.
-
-
-
-
Two on each side.
-
Four on each side.
-
-
Refer to:
Wheel and Tire
(204-04B Wheels and Tires, Removal and Installation).
-
Torque
:
3.6 Nm
-
-
-
Refer to:
Headlamp Adjustment
(417-01 Exterior Lighting, General Procedures).
Copyright © Ford Motor Company